How to Patch a Ferrino High-Altitude Tent Mid-Trip
by Emily Jannet on Nov 01, 2025
Key Points
-
Tent fabric tears don’t have to end your trip — a well‑prepared patch repair can restore integrity on the fly.
-
The self‑adhesive rip‑stop nylon patches from aZengear provide a no‑sew, weather‑resistant fix suitable for high‑altitude tents.
-
Proper surface preparation, patch sizing, and curing (even mid‑trip) maximise durability and repel moisture.
-
With the right approach, you can keep your high‑altitude tent performing rather than packing it away and cutting your trip short.
When a Tear Happens at Elevation
You’re out on your mountain expedition — perhaps on a remote high‑altitude ridge with your Ferrino tent pitched under star‑filled skies. Then you notice it: a small tear in the fly, a snag in the canopy, or maybe a seam that parted from wind stress. In such environments you don’t have the luxury of heading to a repair shop. You need a reliable fix in the field.
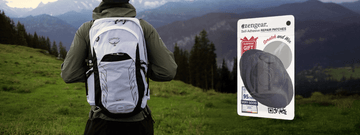
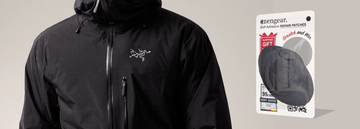
That’s where aZengear’s self‑adhesive rip‑stop nylon patches come into play. Designed originally for repairing jackets, sleeping bags and more, they’re equally effective for tent fabrics. The waterproof, no‑sew solution means you can patch your tent and continue your expedition with confidence.
Why Choose aZengear Patches for a Ferrino Tent
Here are a few reasons why these patches are a smart choice when your Ferrino high‑altitude tent takes damage:
-
No sewing required: Traditional stitching risks damage to the tent’s waterproof membrane or inner coating. With aZengear patches, you simply peel and stick.
-
Rip‑stop nylon and waterproof adhesive: The patch material is designed to be tear‑resistant, soft, and works well where fabric is thin and performance‑oriented. On a tent fly or canopy, that’s exactly the kind of fix you need.
-
Pre‑cut shapes: The set comes with multiple shapes — circles, ovals, rectangles — giving you flexibility to match the size and orientation of the damage.
-
Versatility: Although branded for down jackets and ski gear, the same patches are used for tent repairs too (and aZengear mentions tents in their product listing).
In short: the right fix in the right kit for a situation that demands durability, simplicity, and speed.
Step‑by‑Step: Patching Your Ferrino High‑Altitude Tent Mid‑Trip
Here’s a practical workflow you can follow on‑site — even in challenging conditions.
1. Assess the Damage
Start by locating the tear or puncture. Is it in the flysheet, the canopy, or the floor? How large is it? Are the threads frayed? Is the waterproof coating compromised? You’ll want a patch that overlaps the damaged area by at least 1 cm (about ½ in) all around — more if the fabric has pitched stress or the tear is irregular.
2. Clean the Surface
Even on‑trip, cleanliness matters. Use a cloth or tissue to remove dust, grit, or any condensation around the area. If you have a little water with you, you can gently rinse and dry. Dirt or moisture undermines the adhesive bond. Aim for the patch to go on a flat, dry surface for best results.
3. Flatten and Reposition Fabric
Lay part of the tent fly or canopy flat (as much as the terrain allows). Make sure any loose threads or flapping bits are trimmed or tucked back in. If there’s a gap, press from inside (if accessible) so the fabric lies as flush as possible.
4. Select Patch Shape & Size
Choose from the aZengear the shape that best covers your tear. For long rips, rectangles work well. For small holes or punctures, circles or ovals may be better. Always choose a size with comfortable overlap: bigger is better than too tight.
5. Apply the Patch
-
Peel the backing from the patch.
-
Position centrally over the damage.
-
Press firmly from the centre outward to push out air bubbles and ensure full contact with the tent fabric.
-
On high‑altitude trips, if you have a small flat tool (spoon handle, credit card) you can roll the edges again.
-
If possible, press from the inside of the tent onto the patch from outside (or vice versa) to ensure tight adhesion — especially if the wind is still fluttering the fabric.
6. Let It Set / Cure
Even mid‑trip you should give the adhesive a little time to bond. Avoid heavy flexing of the patched area, don’t lift the fly, and try to shelter it from strong wind or rain while the bond sets.
7. Test Before Heavy Use
After the bond time, test gently. Tug the tent fly slightly, inspect the edges of the patch for lifting, and if things look good you’re ready to continue. Keep an eye on the area during the next few nights — if edges lift, press them down again or consider a secondary patch.
Tips for High‑Altitude & Harsh Conditions
-
Temperature matters: Adhesives bond slower in cold conditions. If you’re above tree line or exposed to wind‑chill, try to apply the patch in a tent vestibule or a calmer spot where the fabric can lie more still.
-
Edge sealing: After the bond time, run your fingertip (or gloved finger) around the patch edge to check for any lifting — press firmly if needed.
-
Avoid high stress zones: Try not to place the patch right over heavily stressed seams or guy‑line anchor points. If the tear is near these, consider reinforcing from the inside with another patch or webbing.
-
Colour match & visibility: The kit offers neutral tones. If your tent is a vivid colour, the patch may be visible. That’s okay — you’re restoring function. On future outings, you might choose a patch shade closer to your fly colour.
-
Carry a spare kit: For long alpine trips, carry an aZengear patch kit in your repair kit alongside tent pole spares and seam sealer. These patches are compact and lightweight — easy to stash in a vestibule pocket.
After Repair: Why This Method Matters
For premium high‑altitude tents from brands like Ferrino, which often feature lightweight fabric, taped seams, and high‑performance coatings, a no‑sew, low‑profile repair is ideal. Traditional stitching can puncture and compromise waterproof membranes or weaken the fabric’s integrity around seams. Using aZengear’s self‑adhesive patch means:
-
Minimal fabric damage (no needle holes)
-
Flexibility preserved — the tent fly or canopy responds to wind without rigid stitching
-
Reliable waterproofing — the patch material and adhesive are designed for outdoor use
-
Quick turnaround — you’re back in the field faster with less downtime
If you’re heading into remote, high‑altitude terrain with your Ferrino tent, a fabric tear doesn’t have to mean the end of the trip. With the right kit — namely the aZengear pre‑cut self‑adhesive patches — you can perform a durable fix, stay dry, and keep your shelter functioning. The method is simple, reliable, and field‑proven.
Pack the kit, know the steps, and treat those patches as essential gear. When the unexpected happens, you’ll be ready—not compromised.
Ready to grab your repair patches? Check out aZengear’s kit here for pre‑cut, self‑adhesive, rip‑stop nylon fabric patches that work for clothing, tents, sleeping bags and more.
Safe travels, sturdy shelter, and happy repairing!
Get yours now on https://azengear.com or #Amazon. Ships worldwide.


