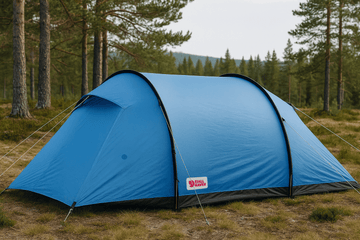
How to Repair a Fjällräven Tent with aZengear Waterproof Patches
by Emily Jannet on Oct 18, 2025
Key Points
-
aZengear Waterproof Patches are ideal for fast, waterproof repairs to Fjällräven tents.
-
Always clean and dry the fabric before applying a patch.
-
Use stitching and seam sealant for larger or high-stress tears.
-
Dual-sided patching improves durability, especially on groundsheets.
-
Keep patches in your gear kit for quick on-the-go fixes.
How to Repair a Fjällräven Tent with aZengear Waterproof Patches
Fjällräven tents are built for adventure—durable, dependable, and designed for the elements. But even the best tents can suffer the occasional rip or tear after repeated use in rugged environments. Luckily, there’s no need to send your tent off for repair or replace it altogether. With aZengear Waterproof Patches, you can patch it up quickly and easily, right at home or in the field.
These self-adhesive patches are pre-cut, soft, waterproof, and made from tear-resistant rip-stop nylon. They’re perfect for restoring everything from small punctures in the flysheet to larger tears in the inner tent body or groundsheet.
What You’ll Need
To get started, gather a few basic items:
-
aZengear Waterproof Patches (available in a multi-pack with various shapes and sizes)
-
Rubbing alcohol or mild soap and water
-
Clean cloth or tissue
-
Scissors (if trimming patch)
-
Optional: Sewing needle and UV-resistant thread
-
Optional: Seam sealer (silicone- or PU-based, depending on your tent fabric)
-
Flat surface for application

Step 1: Assess the Damage
Before jumping into the repair, examine the damaged area closely. Understanding what you’re working with helps determine the best patching method.
Common types of tent damage include:
-
Small punctures or abrasions (usually from branches or sharp objects)
-
Long tears caused by wind stress or tension
-
Seam separations from wear or poor storage
-
Rips around pole sleeves, guy-line anchors, or zippers
-
Pinholes or burns (often from embers or sparks near campfires)
For minor holes (under 2 cm), a single aZengear patch should be enough. For larger or irregular damage, stitching plus patching is more effective.
Step 2: Clean & Prepare the Area
Adhesive needs a clean surface to stick well. This step is critical and should not be rushed.
To prep the fabric properly:
-
Wipe the area clean using rubbing alcohol or mild soap and water.
-
Let it fully dry—moisture weakens adhesion.
-
Smooth out the fabric over a table or flat surface.
-
Trim any loose threads around the tear.
-
If patching near a seam or zipper, keep the area as flat and open as possible.
Step 3: Apply the aZengear Patch
Now you’re ready to fix the tent. The process is simple and fast.
Patch application tips:
-
Choose a patch shape that overlaps the damaged area by at least 2–3 cm on all sides.
-
Trim it if needed and round the corners to prevent edge lifting.
-
Peel the backing carefully to avoid wrinkling the adhesive.
-
Center the patch over the hole and press it down firmly.
-
Smooth from the center outwards to remove air bubbles.
-
Use the back of a spoon, a credit card, or your palm to apply even pressure.
Once applied, the patch creates a strong, flexible barrier that moves with the tent fabric. It’s waterproof, wind-resistant, and ready for use after curing.

Step 4: Reinforce for Durability (Optional)
For bigger tears or damage near high-stress points (like pole attachments), you can increase strength by combining patching with sewing.
To reinforce the repair:
-
Use a running or backstitch to close the tear first.
-
Apply a patch over the stitched area.
-
If possible, apply a second patch to the opposite side of the fabric.
-
Seal the patch edges and stitches with seam sealer.
This creates a watertight, reinforced repair that’s built to last—especially important in bad weather or remote settings.
Step 5: Let It Cure
Adhesive patches bond quickly but need time to set properly.
To ensure long-lasting results:
-
Allow the patch to cure for at least 12 hours before using the tent.
-
Avoid folding or packing the tent during curing.
-
For best results, leave it overnight in a dry, room-temperature space.
Step 6: Special Cases
Not all repairs are alike. Some spots on a tent need more care.
Here’s how to handle tricky areas:
-
Seams: Restitch if loose, then patch over and seal.
-
Zipper areas: Patch carefully to avoid obstructing the zip.
-
Flysheet fabric: Use dual patches for extreme weatherproofing.
-
Groundsheet: Patch both inside and outside for foot traffic resistance.
Fjällräven tents often feature unique materials—like cotton-spun polyester blends—that require careful treatment. Avoid heat or aggressive solvents, and always use compatible seam sealants.
Step 7: Field Testing & Future Prep
Once cured, your tent is ready to hit the trail again. But it’s smart to keep an eye on the repair over time.
Check after first use:
-
Are the patch edges still secure?
-
Is the fabric still waterproof under pressure?
-
Has the area stretched or peeled?
Keeping a small repair kit on hand—complete with extra aZengear patches, thread, and sealer—can be a trip-saver in the wild. A single patch weighs almost nothing and can stop a small problem from becoming a big one.

Because out there, the best shelter is the one you can count on—and a quick DIY repair might just be what saves your next adventure.