Was tun, wenn Ihr Zelt mitten im Sturm reißt?
von {{ author }} Emily Jannet an Apr 19, 2025
Stell dir vor: Der Wind heult, der Regen peitscht herab, und plötzlich – reiß! Dein Zelt bricht zusammen. Genau diesen Moment fürchtet jeder Camper. Aber keine Panik – ein gerissenes Zelt muss nicht das Ende deines Abenteuers bedeuten. Mit dem richtigen Know-how (und etwas Gelassenheit) kannst du alles wieder in Ordnung bringen, trocken bleiben und den Sturm überstehen.
Wir gehen genau durch, was zu tun ist, wenn Ihr Zelt im ungünstigsten Moment reißt – und wie Sie das nächste Mal darauf vorbereitet sind.
Schritt 1: Ruhe bewahren und den Schaden einschätzen
Wenn der Wind auffrischt und die Zeltwand zu flattern beginnt, gerät man schnell in Panik. Doch das Erste – und Beste –, was man tun kann, ist tief durchzuatmen.
Nehmen Sie eine Taschenlampe oder Stirnlampe und untersuchen Sie den Riss kurz. Handelt es sich um ein kleines Loch oder einen großen Schnitt? Dringt Regen ein? Befindet sich der Riss an einer Naht, einem Reißverschluss oder dem Stoff selbst?
Schnelles Denken und klare Beobachtung sind hier Ihre besten Freunde.
Schritt 2: Bewegen Sie die Ausrüstung vom Riss weg
Selbst ein kleiner Riss kann Wasser ansammeln oder tropfen lassen. Wenn du Schlafsäcke, Elektronik, Lebensmittel oder Kleidung in der Nähe hast, bringe sie in den trockensten Teil deines Zeltes. Wenn deine Schlafsachen noch trocken sind, bewahre diesen trockenen Bereich, als wäre er heilig. Du wirst ihn brauchen.
Schritt 3: Nutzen Sie, was Sie haben
Wenn Sie vorbereitet sind (und wir hoffen, dass Sie das sind!), ist es jetzt an der Zeit, Ihr Reparaturset auszugraben.
Ein großartiges Grundnahrungsmittel, das Sie in Ihrem Rucksack haben sollten, ist starkes, durchsichtiges Klebeband für die Zeltreparatur – etwas Wasserdichtes, Flexibles und Robustes, das selbst bei Nässe und Wind hält. Ein solches Klebeband lässt sich selbst mitten im Sturm mit minimalem Aufwand anbringen. Kein Kleben, kein Nähen, einfach abziehen, andrücken und verschließen.

Wenn Sie kein geeignetes Reparaturband zur Hand haben, können Sie mit Folgendem improvisieren:
-
Klebeband (hält allerdings nicht immer auf nassem Stoff)
-
Notfallponcho oder Planenmaterial als Flicken
-
Pflaster oder Pflaster auf Pflastern zur Not (ja, wirklich – es ist nicht schön, kann aber vorübergehend funktionieren!)
Aber für echte Sicherheit? Packen Sie immer etwas ein, das speziell für Zeltreparaturen geeignet ist. Vertrauen Sie uns.
Schritt 4: Trocknen und Flicken
Idealerweise sollte die Oberfläche vor dem Anbringen des Klebebands so trocken wie möglich sein. Mitten in einem Sturm ist das natürlich leichter gesagt als getan.
Gehen Sie wie folgt vor:
-
Tupfen Sie den Stoff mit einem Handtuch, Hemd oder Mikrofasertuch ab.
-
Wenn im Zelt ein Windschutz vorhanden ist, schirmen Sie die Stelle während der Arbeit mit Ihrem Körper oder Ihrer Ausrüstung ab.
-
Bringen Sie das Reparaturband über dem Riss an und drücken Sie es von der Mitte nach außen fest an, um Luftblasen zu glätten.
-
Bei größeren Rissen flicken Sie beide Seiten des Stoffes, um ihn stärker zu machen.
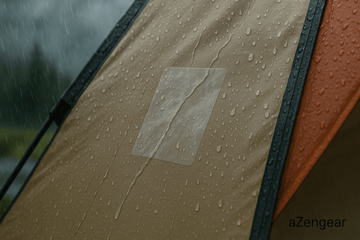
Das Besondere am Strong Clear Tent Repair Tape von aZengear ist, dass es transparent, widerstandsfähig ( klebt ) und für extreme Bedingungen geeignet ist. Sie müssen sich keine Sorgen machen, dass es sich mitten in der Nacht ablöst.
Schritt 5: Bestärken und beruhigen
Sobald der Flicken angebracht ist, behalte ihn die ganze Nacht über im Auge. Sollte der Sturm stärker werden, lege als Reserve eine wasserdichte Schicht (z. B. einen Poncho oder einen Trockensack) locker von innen über die geflickte Stelle. Kein Grund zur Sorge – der Flicken sollte halten, aber ein gutes Gefühl ist Gold wert.
Schritt 6: Am nächsten Tag trocknen
Wenn der Regen endlich nachlässt, ist es Zeit, alles trocknen zu lassen. Ein nasses Zelt + Klebebandflicken + Sonnenlicht = klebrige Sauerei. Aber ein richtiges wasserdichtes Reparaturband? Das bleibt, wo es ist.
Lege dein Zelt in die Sonne (oder so viel Tageslicht wie möglich), lass alles auslüften und überprüfe den Schaden gründlich. Ist der Riss größer als er aussieht, hast du jetzt die Chance, ihn dauerhafter zu reparieren oder zu Hause einen Flicken anzunähen.
Was macht ein gutes Zeltreparaturband aus?
Nicht alle Klebebänder sind gleich – insbesondere bei Outdoor-Ausrüstung. Ein hochwertiges Zeltreparaturband sollte:
-
Wasserdicht – nicht nur „beständig“
-
Flexibel – kann sich bei Wind mit dem Zeltstoff bewegen
-
Klar – damit Ihr Zelt nicht wie ein geflickter Fußball aussieht
-
Kälte- und hitzebeständig – für jede Jahreszeit geeignet
-
Stark genug, um Druck standzuhalten – sogar über Nacht
Deshalb schätzen wir das starke, transparente Klebeband von aZengear zur Zeltreparatur so sehr. Es erfüllt alle Anforderungen – und passt problemlos in jeden Rucksack, jede Tasche oder jedes Handschuhfach.
Bonus: Vorbeugen ist immer besser
Die goldene Regel beim Wildcampen: Warten Sie nicht, bis das Zelt reißt. Überprüfen Sie regelmäßig die Nähte, Belastungspunkte und Abspannleinen Ihres Zeltes. Kleine Schwachstellen werden bei stärkerem Wind oft zu großen Problemen.
Es hilft auch dabei:
-
Vermeiden Sie das Zelten unter Bäumen mit scharfen Ästen
-
Verwenden Sie Bodenplanen zum Schutz vor Steinen und Wurzeln
-
Halten Sie für alle Fälle ein kleines Reparaturset für Ihre Ausrüstung bereit
Letzter Gedanke: Du schaffst das
Ein zerrissenes Zelt im Sturm ist nicht gerade angenehm – aber auch nicht das Ende der Welt. Mit einem ruhigen Kopf, einem guten Flicken und ein wenig Know-how kannst du das Abenteuer fortsetzen und unter strahlendem Himmel aufwachen.
Und wenn Sie das nächste Mal für eine Reise packen? Packen Sie eine Rolle Zengears starkes, transparentes Zeltreparaturband ein . Es könnte der stille Held Ihrer nächsten wilden Nacht unter den Sternen sein.