Reviving Your North Face Jacket: The Easy Guide to Using Repair Patches
by Emily Jannet on Sep 28, 2024
The North Face is renowned for producing high-quality outdoor gear, and their jackets are no exception. Known for their durability, comfort, and performance, these jackets are built to withstand the rigors of outdoor adventures. However, even the most robust gear can encounter wear and tear over time. A small tear or hole in your beloved North Face jacket might seem like the end of the line, but it doesn’t have to be. With the right repair patches and a bit of know-how, you can easily restore your jacket to its former glory. Here’s a comprehensive guide to repairing your North Face jacket with repair patches, ensuring it remains a reliable companion on your adventures.

Why Use Repair Patches?
Before diving into the repair process, it’s worth understanding why repair patches are an excellent solution for your North Face jacket:
- Cost-Effective: Repairing a small tear or hole with a patch is significantly cheaper than replacing the jacket or paying for professional repairs.
- Convenience: Repair patches are easy to apply and can be done at home with minimal tools and time.
- Durability: High-quality repair patches are designed to withstand the elements and maintain the functionality of your jacket.
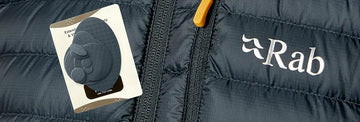
Choosing the Right Repair Patch
Selecting the appropriate repair patch for your North Face jacket is crucial for a successful repair. Here’s what you need to consider:
- Material: North Face jackets are often made from materials like nylon, polyester, or Gore-Tex. Ensure you choose a patch that matches the material of your jacket. Fabric patches work well for fabric-based jackets, while adhesive patches are suitable for quick fixes on various materials.
- Color: Opt for a patch color that closely matches your jacket to ensure a seamless repair. Some patches come in a range of colors or can be trimmed to fit.
- Size: Choose a patch that is slightly larger than the damaged area to ensure complete coverage and a secure fix.
Preparing for the Repair
Before you apply the repair patch, make sure you’re fully prepared:
- Clean the Jacket: Wash and thoroughly dry the area around the tear or hole. A clean surface ensures that the patch adheres properly and provides a long-lasting fix.
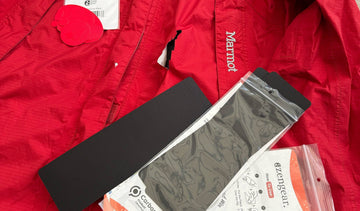
- Gather Supplies: You’ll need the repair patch, a pair of scissors, an iron (if using an iron-on patch), and a flat surface for applying the patch.
Applying the Repair Patch
Here’s a step-by-step guide to applying a repair patch to your North Face jacket:
For Iron-On Patches
- Prepare the Area: Place your jacket on a flat, heat-resistant surface. Smooth out any wrinkles around the damaged area to ensure the patch adheres properly.
- Cut the Patch: Trim the patch to the desired size, making sure it’s slightly larger than the tear or hole. This overlap will help ensure a secure bond.
-
Apply the Patch:
- Preheat the Iron: Set your iron to the appropriate temperature for the jacket’s fabric. Generally, a medium heat setting is sufficient, but avoid steam.
- Position the Patch: Place the patch over the damaged area, making sure it’s centered and properly aligned.
- Iron the Patch: Press the iron down firmly on the patch for 30-60 seconds. Apply even pressure, moving the iron slightly to cover the entire patch. Avoid moving the iron around too much, as this can shift the patch.
- Cool Down: Allow the patch to cool completely before handling the jacket. This will help the adhesive set properly and ensure a strong bond.
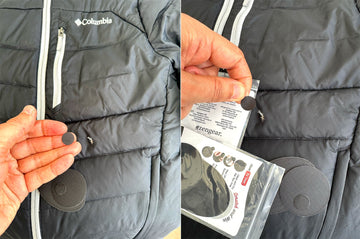
For Adhesive Patches
- Prepare the Area: As with iron-on patches, clean and dry the area around the tear or hole.
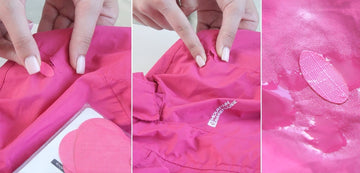
- Cut and Position the Patch: Trim the adhesive patch to fit the damaged area. Place it over the tear or hole, ensuring it covers the entire damaged section.
- Apply Pressure: Firmly press the adhesive patch onto the jacket. You can use your fingers or a flat object to ensure that the patch sticks well.
- Allow to Set: Let the adhesive patch set for the recommended time, usually 24 hours, to ensure a strong bond.

Additional Tips for a Successful Repair
- Test the Patch: If you’re unsure about the patch’s compatibility with your jacket’s fabric, test it on a small, inconspicuous area first.
- Regular Maintenance: Keep an eye on the repaired area and the rest of your jacket for any signs of new damage. Address any issues promptly to prevent further wear and tear.
- Use a Repair Kit: Consider carrying a small repair kit with extra patches and tools on your adventures. This way, you’re prepared for any unforeseen damage while on the go.
Maintaining Your Jacket After Repair
Once you’ve successfully applied the repair patch, it’s important to maintain your jacket properly:
- Follow Care Instructions: Adhere to the care instructions provided by North Face for your jacket. Proper washing and drying will help maintain the integrity of the repair.
- Store Properly: When not in use, store your jacket in a cool, dry place to prevent any additional damage or wear.

Repairing a North Face jacket with repair patches is a straightforward and effective way to extend the life of your beloved gear. By choosing the right patch, preparing the area properly, and following the application steps, you can restore your jacket’s functionality and appearance. Not only does this save you money, but it also keeps you prepared for your next adventure. So, the next time you encounter a tear or hole in your North Face jacket, remember that a simple repair patch is all you need to get back on track and continue enjoying the great outdoors. Happy repairing and even happier adventures!