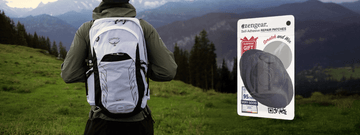
How to Repair Your Hiking Backpack By Using aZengear Repair Patches
by Emily Jannet on Aug 26, 2024
A sturdy, reliable backpack is one of the most crucial pieces of gear for any hiker. It carries all your essentials, from food and water to first aid kits and extra clothing. However, even the toughest backpacks are susceptible to wear and tear, especially when subjected to rugged terrains and harsh weather conditions. Tears, holes, and frayed seams can compromise the durability and functionality of your backpack. Fortunately, aZengear repair patches provide an easy and effective solution to extend the life of your hiking backpack. In this blog post, we’ll guide you through the steps to repair your backpack using aZengear repair patches, ensuring your gear is ready for your next adventure.
Why Use aZengear Repair Patches?
Before diving into the repair process, it’s worth understanding why aZengear repair patches are an excellent choice for fixing your hiking backpack. Here are some of the key benefits:
- Durability: aZengear repair patches are made from high-quality, durable materials that can withstand the rigors of outdoor use. They are designed to last, ensuring that your repairs are long-lasting.
- Waterproof: These patches are waterproof, which is essential for maintaining the integrity of your backpack in wet conditions. Whether you encounter rain, snow, or water crossings, your patched-up backpack will remain protected.
- Easy Application: aZengear patches are user-friendly, with an adhesive backing that makes them easy to apply. You don’t need any special tools or sewing skills to use them, making them accessible to all hikers.
- Versatility: These patches can be used on a variety of materials, including nylon, polyester, and canvas. This versatility means you can use them to repair not just backpacks but also tents, jackets, and other gear.
- Aesthetic Appeal: Available in a range of colors and designs, aZengear patches can blend in with your backpack or add a touch of personal style. They don’t just fix your gear; they can enhance its appearance.
Step-by-Step Guide to Repairing Your Backpack
Now that you know why aZengear patches are the go-to solution for repairing hiking gear, let’s go through the steps to repair your backpack.
Step 1: Assess the Damage
The first step in repairing your backpack is to thoroughly assess the damage. Identify all the tears, holes, or frayed areas that need repair. It’s essential to clean the affected areas to remove any dirt, dust, or debris that could interfere with the adhesive. Use a damp cloth to gently clean the area and let it dry completely before applying the patch.
Step 2: Choose the Right Patch
aZengear offers patches in various sizes, shapes, and colors. Choose a patch that covers the damaged area completely, with some overlap to ensure a secure bond. If the damage is in a high-stress area, such as a seam or strap, consider using a larger patch or multiple patches for added reinforcement.
Step 3: Prepare the Patch
Once you’ve selected the appropriate patch, peel off the backing to expose the adhesive. Be careful not to touch the sticky side too much, as oils from your fingers can reduce the effectiveness of the adhesive. If the patch needs to be cut to fit a specific area, use sharp scissors to trim it to the desired size and shape.
Step 4: Apply the Patch
Align the patch with the damaged area, ensuring it covers the entire tear or hole with some overlap. Press the patch firmly onto the backpack, smoothing out any wrinkles or air bubbles. Apply pressure evenly across the patch to ensure a strong bond. Some hikers find it helpful to place a heavy object, like a book, on the patch for a few minutes to enhance the adhesion.
Step 5: Check the Repair
After applying the patch, inspect the repair to ensure it’s secure. Gently tug on the material around the patch to make sure it’s holding well. If the patch appears to be lifting at the edges, press it down again and apply more pressure. For added security, you can apply a second patch on the opposite side of the material if accessible.
Step 6: Test the Backpack
Before heading out on your next hike, it’s a good idea to test your backpack. Load it up with some weight and take it for a short walk to ensure the repair holds up under stress. Pay particular attention to the repaired areas, checking for any signs of peeling or further damage. If everything looks good, your backpack is ready for action!
Additional Tips for Backpack Maintenance
While aZengear repair patches are a great solution for fixing damage, proper backpack maintenance can help prevent issues from arising in the first place. Here are some additional tips to keep your backpack in top shape:
- Regular Inspections: Frequently inspect your backpack for signs of wear and tear, especially after long hikes. Early detection of small issues can prevent them from becoming bigger problems.
- Proper Cleaning: Clean your backpack regularly according to the manufacturer’s instructions. Avoid harsh detergents and make sure the backpack is completely dry before storing it.
- Avoid Overloading: Overloading your backpack can strain seams and zippers, leading to damage. Stick to the recommended weight limits and distribute the load evenly.
- Store Properly: When not in use, store your backpack in a cool, dry place away from direct sunlight. Prolonged exposure to UV rays can weaken the material and cause fading.
- Handle with Care: While backpacks are designed for rugged use, handling them with care can extend their lifespan. Avoid dragging your backpack on rough surfaces and be mindful of sharp objects that could puncture the material.
Other Useful Tips:
- How to Repair a Nike Jordan T-Shirt with aZengear Repair Patches
- How to Repair Your North Face Down Jacket with Pre-Cut aZengear Repair Patches
Hiking backpacks are essential gear, and taking care of them ensures they can keep up with your outdoor adventures. aZengear repair patches offer a simple, effective, and durable solution for repairing damage, allowing you to extend the life of your backpack and save money on replacements. By following the steps outlined in this guide, you can confidently repair your backpack and continue exploring the great outdoors with peace of mind. Remember, a well-maintained backpack is not just about function—it’s also about preserving the memories and experiences of all the journeys it has accompanied you on.


