How to Repair Your North Face Down Jacket with Pre-Cut aZengear Repair Patches
by Emily Jannet on May 10, 2024
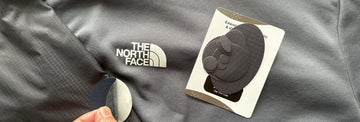
Your North Face down jacket has been with you through thick and thin, shielding you from the elements and keeping you warm on your outdoor escapades. However, as with any well-loved piece of gear, it's bound to experience a bit of wear and tear over time. Before you retire your favourite jacket, consider a simple and cost-effective solution: aZengear Repair Patches. In this guide, we'll show you how to easily mend your North Face jacket using pre-cut patches, breathing new life into your beloved outdoor gear.

Getting to Know Your Go-To Solution: aZengear Repair Patches
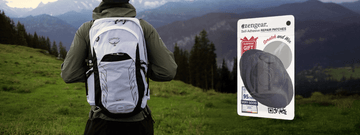
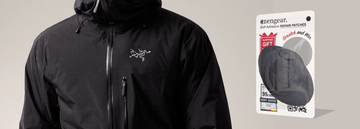
aZengear Repair Patches are a convenient solution for repairing outdoor gear, including North Face down jackets. The patches are pre-cut and crafted from durable materials, making them easy to apply and long-lasting. Available in various colours, aZengear down jacket repair patches seamlessly blend with your jacket's fabric, providing discreet repairs that are as functional as they are stylish. With no need for scissors or ironing, these patches offer a hassle-free way to extend the life of your gear.
Materials Needed
Before you begin the repair process, gather the following materials:
- North Face down jacket in need of repair
- Pre-cut aZengear Down Jacket Repair Patches (appropriate size and colour)
- Clean cloth
- Mild detergent (if necessary)
Step-by-Step Repair Guide
-
Assess the Damage
Examine your North Face down jacket to identify any areas that require repair. Look for tears, holes, or worn-out sections where down insulation may be poking through.
-
Clean the Area
If the damaged area is dirty, gently clean it with a damp cloth and mild detergent. Allow the area to air dry completely before proceeding with the repair.
-
Prepare the Patch
Select a pre-cut aZengear Repair Patch that matches the colour of your North Face jacket or choose a contrasting colour for a unique look. Peel off the backing to expose the adhesive side of the patch.
-
Position the Patch
Carefully place the patch over the damaged area, ensuring it fully covers the tear or hole. Press down firmly on the patch to secure it in place.
-
Smooth Out Any Bubbles
Use your fingers to smooth out any air bubbles or wrinkles under the patch, ensuring a seamless repair.
-
Apply Pressure
Using the edge of a clean cloth or your fingertips, apply firm pressure to the patch, pressing down on all edges and corners. Continue applying pressure for 30-60 seconds to ensure a strong bond.
-
Allow to Set
Once the patch is securely in place, allow it to set for a few minutes to ensure the adhesive fully adheres to the fabric.
-
Test the Repair
After the patch has set, gently tug on the edges to ensure it's firmly attached to the jacket. If the patch feels secure, your repair is complete.
Benefits of Using Pre-Cut aZengear Down Jacket Repair Patches
Repairing your North Face down jacket with pre-cut aZengear Down Jacket Repair Patches offers several advantages:
Easy to use: With no need for scissors or ironing, these patches make the repair process quick and hassle-free.
Cost-effective: Repairing your North Face down jacket is more affordable than replacing it with a new one.
Eco-friendly: Extending the life of your gear reduces waste and helps minimize your environmental impact.
Durable: Crafted from high-quality materials, these patches provide long-lasting repairs that can withstand outdoor adventures.
Don't let minor damage spell the end for your North Face down jacket. With pre-cut aZengear Down Jacket Repair Patches, you can easily mend tears and holes, extending the life of your favourite outdoor gear. Follow the simple steps outlined in this guide to make quick and effective repairs, ensuring your jacket stays ready for your next adventure. Keep a supply of pre-cut aZengear patches on hand, and you'll be equipped to tackle any repair job with ease, preserving your gear for years to come.


