How to Patch a Sleeping Bag: A Step-by-Step Guide
by Emily Jannet on Jun 11, 2024
Nothing ruins a camping trip faster than discovering a tear in your sleeping bag, leaving you exposed to the cold and elements. These mishaps are all too common, whether caused by a sharp rock, a stray branch, or simple wear and tear. Instead of rushing to buy a new one, why not fix the damage yourself? Patching a sleeping bag is a practical skill that not only saves you money but also extends the life of your trusted gear. This guide will walk you through the process of effectively repairing your sleeping bag, ensuring you stay warm and cozy on all your outdoor adventures.
Why Patch a Sleeping Bag?
Patching a sleeping bag is not only a cost-effective solution but also an environmentally friendly one. By repairing rather than replacing, you reduce waste and extend the life of your gear. Additionally, fixing a small tear or hole promptly can prevent it from becoming a larger problem that’s harder to repair.
What You’ll Need
Before you begin, gather the following materials:
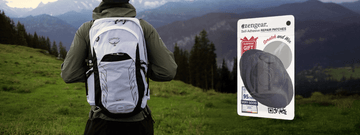
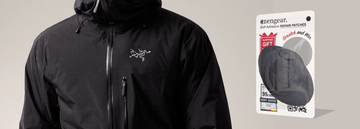
aZengear Repair Patch Kit: This kit includes 11 pre-cut self-adhesive patches and instructions.
Rubbing Alcohol: For cleaning the area around the tear.
Cloth or Sponge: For applying the rubbing alcohol.
Tweezers: Optional, but helpful for precise patch placement.
Seam Sealer: To ensure a waterproof seal around the patch. Optional, but might be important for high-stress areas.
Step-by-Step Repair Process
Step 1: Clean the Area
Start by cleaning the area around the tear. Use a cloth or sponge to apply rubbing alcohol, which will remove dirt, oils, and other residues that could interfere with the adhesive. Allow the area to dry completely before proceeding.
Step 2: Prepare the Patch
Select a patch that will cover the tear with at least a half-inch overlap on all sides.
Step 3: Apply the Patch
Peel the backing off the adhesive side of the patch. Carefully place the patch over the tear, ensuring it covers the entire damaged area with some overlap. Press down firmly, smoothing out any air bubbles or wrinkles. Use your fingers or a flat object to ensure good contact between the patch and the sleeping bag fabric.
Step 4: Seal the Edges
For added durability, apply seam sealer around the edges of the patch. This step is particularly important if the tear is in a high-stress area or if you expect to use the sleeping bag in wet conditions. Allow the seam sealer to dry according to the manufacturer’s instructions.
Step 5: Test the Repair
Once the patch and seam sealer are fully dry, test the repair by gently tugging on the patched area and ensuring it holds securely. Inflate the sleeping bag (if it has an inflatable component) or give it a light tug to simulate normal use. If the patch holds firm, your repair is complete!
General Tips for Successful Patching
Choose the Right Patch: Ensure the patch material matches or is compatible with your sleeping bag fabric. Using a patch that’s too stiff or too thin can lead to an ineffective repair.
Work in a Clean Environment: Dirt and debris can compromise the adhesive. Work on a clean, flat surface to avoid contamination.
Take Your Time: Rushing through the repair process can result in misaligned patches or incomplete sealing. Follow each step carefully for the best results.
Regular Maintenance: Inspect your sleeping bag periodically for small tears or worn areas. Addressing minor issues before they become major problems will extend the life of your gear.
Alternative Repair Methods
If you don't have a repair kit or prefer other methods, consider these alternatives:
Duct Tape: A quick, temporary fix for small tears. It won’t last as long as a proper patch but can be a lifesaver in the field.
Sewing: For those comfortable with needle and thread, sewing a patch over the tear can be effective. Use a zigzag stitch for added strength and follow up with seam sealer for waterproofing.
Iron-On Patches: Some outdoor stores sell iron-on patches specifically for sleeping bags. These can also be an option if you have access to an iron and want a quick fix.
Fixing a tear in your sleeping bag can be surprisingly simple and immensely satisfying. By addressing small issues before they become big problems, you ensure that your sleeping bag remains a reliable companion on all your adventures. Not only does this save you the expense of a new bag, but it also fosters a sense of self-reliance and environmental stewardship. Armed with a few basic tools and the knowledge to use them, you can confidently tackle any repairs that come your way. So the next time your sleeping bag suffers a snag, remember that a quick patch can keep you comfortable and ready for whatever the outdoors has in store.